
Great cook out photos capture the food, the people and the mood, yet most shots end up too dark, too harsh or too cluttered to share.
Smoke, bright sun and fast-moving guests make a backyard barbecue harder to photograph than it looks. This guide gives you ideas, a shot list and simple settings that work on a phone or a DSLR camera.
What Makes Great Cook out Photos
Great cookout photos make viewers feel the afternoon. They want to smell the smoke, hear the laughter and reach for a plate. A sharp picture of a burger is a start, but the images people save and share carry more than one layer.
Four elements do most of the work:
- Food: glistening burgers, charred corn, bright salads and cold drinks that look ready to eat.
- Atmosphere: the grill, string lights, picnic tables, paper plates and the backyard setting that signal a summer gathering.
- People: hands flipping burgers, kids with watermelon, friends gathered around the grill.
- Candid moments: a mid-laugh toast or a cook checking the coals tells the story better than a posed lineup.
The strongest sets mix wide scene-setters, medium action shots and tight food details. That variety lets a viewer move through the day the way a guest would, from arrival to the last bite of dessert.
Holiday gatherings such as a Fourth of July barbecue add color and tradition, but any weekend backyard meal can produce memorable images with the right attention to light and timing.
Cookout Photo Ideas and a Shot List
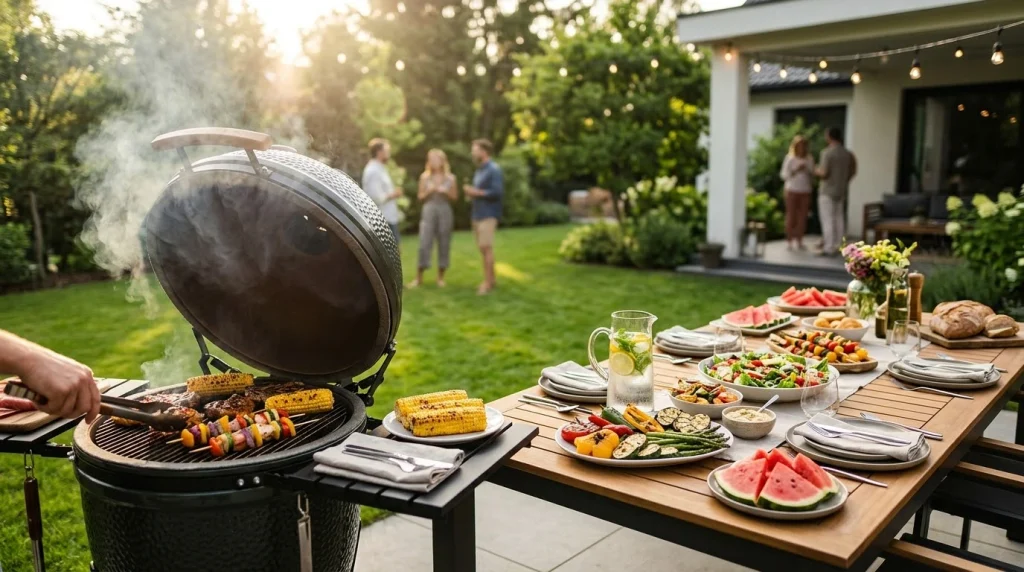
Shoot a cookout in the order it unfolds: setup, cooking, eating, and wind-down. This shot list covers the cookout photos most hosts wish they had afterward.
- The grill in action: flames, flipped burgers, and the cook with tongs in hand.
- Finished plates: one overhead shot of a full plate, plus a close-up of a bite-ready burger or rib.
- The spread: a wide view of the table with salads, buns, drinks, and desserts.
- Kids at play: sprinklers, yard games, and sticky-fingered watermelon moments. Shoot from their eye level.
- Toasts and cheers: raised cups, clinking bottles, and the faces around them.
- Decorations: string lights, flags, and banners. These work especially well for a Fourth of July gathering.
- Detail shots: condiment bottles, corn husks, condensation on a cold drink, and checkered napkins.
- Group portrait: everyone together near the grill or table, taken before the food disappears.
- Candid moments: laughter, storytelling, and the cook sneaking a taste.
Capture the group portrait early, while everyone is still tidy and the light is good. Candids come naturally once people relax.
Best Lighting for Cook out Photos
Soft, low-angle light beats everything else. Plan your most important shots around it, and use simple fixes when the light is less than ideal.
- Golden hour: The hour before sunset gives warm, flattering light on faces and food. Place people so the sun hits them from the side or behind. A backlit shot of a family at the grill looks great, but check that faces are not too dark.
- Harsh midday sun: Overhead light creates squinting eyes and deep shadows. Move the group into open shade, or put a white sheet or poster board beside the subject to bounce light back.
- Shade: Shade under a tree, porch or umbrella is even and kind to skin tones. Stand near the edge of the shade so the light has a direction and the picture does not look flat.
- Smoke: Smoke shows up best against a dark background with the sun behind it. Shoot from the side and avoid a bright, cluttered backdrop.
- Evening string lights: Warm bulbs create a cozy mood. Hold the camera steady, tap to focus on a face, and keep the lights in the background as soft glowing dots.
Good light turns ordinary cookout photos into pictures people want to keep.
Camera and Phone Settings for Cookouts
Match your settings to the scene, not the whole day. Cookouts mix bright sun, deep shade, fast kids and slow smoke, so one preset rarely works. Use the table below as a starting point, then adjust to your light.
| Scene | Phone mode | DSLR or mirrorless | Key tip |
|---|---|---|---|
| Grilled food, close up | Standard or Portrait, tap to focus on the food | Aperture priority, f/2.8 to f/5.6, ISO 100 to 400 | Focus on the sear or grill marks. |
| Kids and games | Burst mode | Shutter priority, 1/500 sec or faster, continuous autofocus | Fast shutter freezes motion. |
| Group shots at the table | Standard, 1x lens | Aperture priority, f/5.6 to f/8 | Stop down so every face stays sharp. |
| Golden hour portraits | Portrait mode, lower exposure slightly | Aperture priority, f/1.8 to f/4 | Expose for faces, not the bright sky. |
| Smoke and flames | Lock exposure, avoid digital zoom | Manual, 1/250 sec or faster | Underexpose a little to keep smoke detail. |
| Evening and string lights | Night mode, brace the phone | Wider aperture, ISO 800 to 3200 | Raise ISO before dropping shutter speed too low. |
Wipe your lens first. Grill grease and sunscreen smudges cause hazy, flat cookout photos faster than any wrong setting.
How to Photograph Grilled Food and Smoke
Shoot grilled food within minutes of pulling it off the heat, while the surface still glistens and steam rises. Cold burgers and dull sausages look flat in any light.
Pick the angle for the food. Burgers and sandwiches read best from straight on, at table level, so the layers show. Ribs, corn and skewers look better from a 45-degree angle. Use an overhead view for a full spread of plates and sides.
Style lightly. Brush on a little oil or sauce to restore shine, add a lime wedge or a sprinkle of fresh herbs, and wipe plate rims. Keep real grill marks, drips and char. Those details make bbq food photography believable.
Use backlighting for smoke. Place the light behind or beside the grill, such as low golden hour sun, and shoot against a darker background. Smoke and steam then glow instead of vanishing. Take bursts as the lid opens, since smoke shifts every second.
Keep the human moment. A hand flipping a burger or reaching for a plate adds life to your cookout photos without feeling staged. Check focus on the food, not the flames.
Key Takeaways
- Tell the whole story. Mix wide scene-setters, mid-range action at the grill, and close-ups of the food and people.
- Use a short shot list. Planning a few must-have frames keeps you from missing the moments that matter at a busy gathering.
- Shoot in soft light. Golden hour or open shade flatters food and faces. Harsh midday sun and direct flash do not.
- Your phone is enough. A smartphone handles most backyard scenes. A DSLR adds control over depth of field and low-light detail.
- Photograph food fast. Grilled food looks best right off the heat, so shoot it while it still glistens and the steam still shows.
- Treat smoke as a feature. Backlight it, use a dark background, and watch your exposure so the highlights do not blow out.
- Clean up the frame. Wipe the lens, clear clutter from the background, and keep editing light.
Frequently Asked Questions About cook out photos
What is cook out photos?
It means photographing an outdoor barbecue gathering: the food, the grill, the guests, and the setting. The category covers candid family moments, action shots of the cook, close-ups of plated dishes, and wide views of the backyard. It suits anything from a casual weeknight grill-out to a Fourth of July party.
How does cook out photos work?
You plan a short shot list, pick soft light such as golden hour, and set up your phone or camera for the scene. Then you shoot in layers: wide frames of the setting, mid-range shots of people and the grill, and tight food details. Finally, you choose the best frames and edit lightly.
Is cook out photos worth it?
Yes, if you want to keep memories of gatherings or share your food well. It takes little gear, since a smartphone works fine. The real cost is a few minutes of planning and the discipline to take pictures before the food cools. The payoff is a set of lasting images.
What should I know before trying cook out photos?
Check the light and the time of day first, and wipe your lens. Decide who will shoot so the cook does not miss the party. Keep a short shot list handy. Plan to photograph food right off the grill, because it loses its shine and steam quickly.
Where can I find cook out photos?
The best source is your own gatherings, since personal images carry the most meaning. For inspiration, browse photo-sharing platforms, food blogs, and stock libraries. If you plan to reuse someone else’s picture, check its license and usage terms first, and ask permission when it is not clearly free to use.
What are common mistakes with cook out photos?
The most common mistakes are shooting in harsh midday sun, leaving a smudged lens, and including cluttered backgrounds. Others include using direct flash, taking only wide shots, waiting until food goes cold, blowing out bright smoke highlights, and over-editing colors until the food looks unnatural. A shot list and soft light prevent most of these.
About This Article
This guide was written with AI assistance from publicly available information. Prices, nutrition values and availability can change, so confirm important details with the official source before you decide.
Pingback: The Cook Out: Menu, Locations and Hours